I have long been curious about water. It is such an enigmatic fluid. It falls from the sky, flows in rivers to the seas and oceans where it circulates, its surface blown into waves by the wind. Water evaporates and condenses as clouds.
 | ||
| Water looks clear in a glass. | |
Our bodies are about sixty percent water. We drink it, swim in it, bathe in it. I like to paddle my kayak over its surface. But what color is it? Is it colorless, as it sometimes appears in a glass? If so, why does the sea sometimes look blue, sometimes green, sometimes grey?
 |
| Water sometimes looks green, or blue. |
I am not alone in pondering. More than two thousand years ago, in the 1st Century BC, the poet Lucretius puzzled over the nature of water. He wrote in his poem, De Rerum Natura Book II, (translated as ‘On the Nature of Things’), “If the oceans are made up of blue matter, however we manipulated them we would never see them in other colors. How can we see water as white if it is made up solely of azure, blue? Yet on rough days, do we not see the oceans marble white?”
 |
| Water can look white. |
The surface of water reflects light, but light also penetrates. Short wavelengths of light penetrate farther than long wavelengths before being absorbed, the light energy converted to heat.
Long wavelengths, such as red light, penetrate only the
surface layers of water, while shorter wavelengths, such as blue and violet
penetrate deeper before being completely absorbed. Divers at depth must carry
lights to reveal colors other than shades of blue. Blue light scatters within
water, bouncing off the water molecules, so when we look down into deep clear
water, we see it as blue. It is blue from within, not just from reflected blue
sky.
 |
| Deep, clear water can appear blue, not in shallows. |
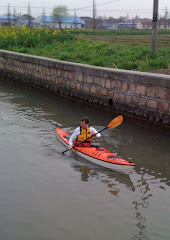
The water I kayak on seldom appears blue when I look closely. Sometimes it looks green, cyan, yellow, or orange
 |
| Orange tannin-rich water in Florida. |
Artists employ a wide palette of colors to realistically depict water.
 |
| Monet: 'Cliff Walk at Pourville, with detail, left. |
The detail, above left, reveals that Monet used at least white, two shades of green, teal, two of blue and a lilac color, in short brushstrokes, to achieve the overall impression of a choppy sea. The colors change with water depth, and with distance.
 |
| Turner:Venice, the Dogana and San Giorgio, with detail, left. |
In the detail from Turner’s painting of Venice, the water is pea-green, yellow, and blue, indicating the shallow depth and the reflective surface. Elsewhere on the full picture Turner used additional colors to represent reflections of boats and buildings.
When we look at the sea, sometimes we see it as monochrome blue, or green, but is it really? Both these artists recognized that water is not monochrome. The colors are complex: a mixture of what lies on the surface, what is within and what lies beneath, with reflections adding complexity. So, what color is water?
The book: 'What Color is Water?' explains the chameleon nature of water. Lavishly illustrated, it highlights the properties of water and questions how reflections, and what lies on, and under the water, affect the colors embodied in sunlight.
Interested in: 'What Color is Water?' Order a copy from your local bookstore, or purchase online.
 |
| What Color is Water? by Nigel Foster |